Showing posts with label CCSS. Show all posts

Monday, December 8, 2014

Informational Text Resources on the Web

In the Common Core State Standards, you see a discussion about introducing more informational text to students.  In the 4th grade, for example, you should see 50% literacy and 50% information.  The percentage of information increases in the higher grade levels.  Informational text can include science and social studies textbooks, but there is so much more out there teachers can use in the classroom.

These are just a few of the resources out there teachers of all grade levels (and subject areas) can use to increase the informational text in the classroom.

Read Works - www.readworks.org

Read Works is a free resource (account required) that provides teachers with a variety of reading passages. You can search the passages according to grade, lexile level, and skill. (Just to name a few.) The passages contain comprehension questions in multiple choice and open response format.


If you want more than a passage, you can explore Read Works' growing list of skill units and novel studies. The novel studies are paired with other text for integration of non-fiction and fiction.


NEWS ELA - www.newsela.com

NEWSELA allows teachers to discuss current events with their class and yet staying within the Lexile level range of the students.  For example, the article about Baghdad's music and ballet school can be printed in 650L, 900L, 1010L, 1040L, and max.  This allows the various reading levels to experience the information without feeling frustrated.


Like Read Works, NEWS ELA does require an account and the material is correlated to the CCSS.

News-O-Matic - press4kids.com

News-O-Matic is a daily newsletter you can have sent to your inbox. Each newsletter contains short, current events articles.  Each article comes with four comprehension questions and is correlated to one CCSS. You can also download News-O-Matic onto your iOS and Android device, but there is a fee.  The daily email digest is free.

TweenTribune - www.tweentribune.com

The Tween Tribune is part of the Smithsonian, and like NEWS ELA is a collect of current events articles students can read on or near their reading level. Tween Tribune is for grades 5-8.  Grades K-4 can access TT Junior and grades 9-12 can access Teen Tribune. Students can log into their respective site (after a teacher account is created and parent permission is given) to access assigned articles, make comments, and complete quizzes.


These are just a few of the resources out there for teachers who are in search of informational text.  What site is your go-to resource?  Share your favorites here!

Monday, April 28, 2014

a partner for digital writing - Popplet

Common Core State Standards ~ Writing Standard #6

~ Kindergarten-2nd Grade - With guidance and support from adults, explore a variety of digital tools to produce and publish writing, including in collaboration with peers.

~ 3rd Grade - With guidance and support from adults, use technology to produce and publish writing (using keyboarding skills) as well as to interact and collaborate with others.

~ 4th Grade - ....demonstrate sufficient command of keyboarding skills to type a minimum of one page in a single sitting.

When you read this standard, there are a few words that stand out most teachers are not 100% comfortable with - digital tools, technology, collaboration/collaborate, keyboarding. Popplet is one of many web resources teachers can use to help address those uncomfortable, techie words!


Popplet is a web resource that allows the user to create a graphic organizer/thinking map/bubble map. Popplet has a free and paid edition.  I currently use the free edition, and love the potential!

First things first, you need to create an account.  Once the account is created, you can start make your first Popplet. When you make a new Popplet, you will need to provide a title and select its background color.


You will start off with a blank screen, which is great because you have a blank canvas to work with! The bubble within Popplet are called Popples. These can be made by either double clicking on the screen or selecting "new popple" found under the tools icon.


Each popple can be moved by simply clicking and dragging. You can also increase and decrease the size of the popple.

A popple can include typed text, an image/video from either the web or your computer, or a drawing. You can also change the color of the popple. These four options are located on the bottom. The upper right corner provides a place for comments related to the popplet and the four gray circles will create and connect a new popplet.


Do you notice my name in the upper left corner? This is because I made the popple using my account.  You can invite other users to join this Popplet. This will allow for collaboration among multiple users on one "document".


I have just touched the surface of what Popplet can do!  Below are the other options until the tools icon.  Popplets can be printed, exported, viewed full screen, etc!


Do you already use Popplet?  Share your thoughts and ideas!


Sunday, March 2, 2014

Mississippi Common Core Collaboration

The MS Common Core Collaboration Group is about to turn one year old in April! This group is definitely a labor of love.  I know we are just beginning, but this group will have a huge impact on stakeholders finding and better understanding the Common Core State Standards.

The mission of the Mississippi Common Core Collaboration is the facilitate preparedness and ensure success in achieving the expectations established by the Common Core State Standards.

There are three ways to connect with the MSCCC.  LinkedIn, Twitter, and our resource website.

(1) MSCCC PLC on LinkedIn
There are current 1839 members on our PLC through LinkedIn. Members include teachers, administrators, state department employees, college instructors, and education groups. The PLC's main goal is to provide a place for members to get together and share/learn/grow on all things Common Core.  You do need a LinkedIn account to join, but that is free and easy to do. Click on the Link to check us out!  http://tinyurl.com/nhvsbnn

(2) MSCCC on Twitter
We know how awesome Twitter is on access PD 24/7.  That is why we are there! We share and search for resources and news articles that focus on better preparing teachers, students, and parents on the Common Core.  You can find us at @MSCCCollaborate.

(3) Mississippi Common Core Collaboration website
This site will be the go-to resource for Common Core. It is still a work in progress, but resources are added daily.  The current website address is www.msccc.net. The site allows you to search by standard to find resources.

If you are not an educator in Mississippi, its ok! We still encourage you to join this great group!

Monday, December 16, 2013

Student Presentations with ScreenChomp

Within the Common Core State Standards, students in grades K-4 are asked to create visual displays and audio recordings for presentations.

Speaking and Listening Standard #5:

K - Add drawings or other visual displays to descriptions as desired to provide additional detail.
1st Grade - Add drawings or other visual displays to descriptions when appropriate to clarify ideas, thoughts, and feelings.
2nd Grade - Create audio recordings of stories or poems; add drawings or other visual displays to stories or recounts of experiences when appropriate to clarify ideas, thoughts, and feelings.
3rd Grade - Create engaging audio recordings of stories or poems that demonstrate fluid reading at an understandable pace; add visual displays when appropriate to emphasize or enhance certain facts or details.
4th Grade - Add audio recordings and visual displays to presentations when appropriate to enhance the development of main ideas or themes.

One tool students can use to help bring their presentation to life is with the iPad app ScreenChomp.  ScreenChomp is a free app created by TechSmith that allows students to create digital presentations with their own voice and student created drawings.


As you can see, ScreenChomp contains just what the students will need to create a digital presentation, including a cute green monster!


Students can select from three different pen widths and 12 different colors. Pictures from within the Camera Roll can also be selected for the background, if the students choose. The item between the background and pens will erase the entire screen and the eraser will let you select what to remove. Once the students are ready, they hit the red "rec" button to begin recording.


Students can pause and stop the recording. Keep in mind, clicking stop will end the recording while pausing will let you go back if needed.  You can also watch your time with the timer on the upper right corner.


Once stop is selected, students will get to preview their presentation and either trash it or share it.  If you decide to do neither, you want to at least rename the file so you can find it later on ScreenChomp.  When you click "Share" you are provided with a web address for sharing and future use. Who doesn't want to share student created movies with parents and school stakeholders?!

The Common Core State Standards are not the only standards ScreenChomp can help you meet.  Multiple NETS*S can also be included in the list above.

1b - Create original works as a means of personal or group expression.
2b - Communicate information and ideas effectively to multiple audiences using a variety of media and formats.
5b - Exhibit a positive attitude toward using technology that supports collaboration, learning, and productivity.
6b - Select and use applications effectively and productively.

ScreenChomp doesn't have to be used be one student either. Because you have the ability to pause, a small group of students can create a presentation using the same iPad. You can also find ScreenChomp being used in all subject areas, since this app is not geared toward a specific subject area. This means ScreenChomp can be used to present how to solve and multiple step problem and explain the life cycle of a frog.

So how do you use ScreenChomp?


Wednesday, November 27, 2013

No.. the standard doesn't say PowerPoint (part 2)

What?! Are you still using PowerPoint?  I understand, for many teachers PowerPoint is the go-to resource because they know if backwards and forwards.  Try these resources and ideas when Speaking & Listening Standard #5 is in front of you.

Third Grade - #5 Create engaging audio recordings of stories or poems that demonstrate fluid reading at an understandable pace; add visual displays when appropriate to emphasize or enhance certain facts or details

Fourth Grade - #5 Add audio recordings and visual displays to presentations when appropriate to enhance the development of main ideas or themes.

In part 1, we looked at resources students can use for create audio recordings. For part 2, we will look at visual displays both students and teachers can use when presenting information.

Infographics

Students (and teachers) can present data in beautifully through infographics.  Infographics are graphics that present information. You need to make sure you have the data (research) completed before you start putting everything together. Without data, you will find your students staring at the computer screen for a while not knowing what to do!

http://infogr.am/ and http://www.easel.ly/ ~ Two resources students and teachers can use to create infographics.

You will want to explore both sites before letting your students loose in the computer lab.

Student Created Visual Displays

Students don't need to do a Google Image Search to find presentation enhancing visual displays.  These displays can be student created in many ways.

My daughter gets frustrated when she can not find the image she wants to use. Even though she isn't an artist, she can create just the right illustration for her presentation.  Let your students draw just what they want to enhance their presentation.  Then scan or take a picture of the illustration so students can add them as needed.

Don't let picture taking stop at shooting student drawings.  Let students get creative and get pictures and/or videos to enhance what they are researching. For example, if the students working on a presentation of a historical figure, let the students reenact an event and record it. Yes, it may be easier to find a historical video, but the students will really take ownership of their learning and the project if they create their own video.

Visual displays do not have to high tech. Students can create posters that showcase the main points or key ideas for the presentation.

So, do you feel comfortable walking away from PowerPoint yet?

Saturday, November 23, 2013

No.. the standard doesn't say PowerPoint (part 1)

Teachers... step away from PowerPoint! No where does it say for students to create one!

For most teachers, when they read the below Speaking & Listening standards, they assume it means to create a PowerPoint. Students can use multiple resources that don't include PowerPoint to meet these standards.

Third Grade - #5 Create engaging audio recordings of stories or poems that demonstrate fluid reading at an understandable pace; add visual displays when appropriate to emphasize or enhance certain facts or details

Fourth Grade - #5 Add audio recordings and visual displays to presentations when appropriate to enhance the development of main ideas or themes.

We are going to focus on audio recordings and the different resources out there for students and teachers. If your students are anything like my 3rd grade daughter, recording their voice should be no problem.

Vocaroo @ www.vocaroo.com
This is a web based voice recorder. You will find the website is straight forward and rather simple for students to use.

Students go to the website and click on the "Click to Record" button.  They will, of course, need a microphone.


Once the student finishes recording, they can listen, retry, or save the recording.

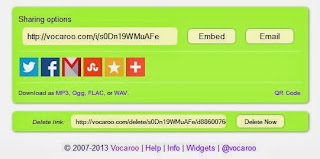
Students can "save" the recording in multiple ways. The recording can be shared on social media, like Twitter or Facebook. The recording can be downloaded as a MP3 or even made into a QR code.


Audacity (software for PC or MAC) @ http://ninite.com/ or http://audacity.sourceforge.net/
This is a program that can be downloaded for free on either PC or MAC. It looks intimidating, but is easy to use for voice recording.

The students will use three buttons - record, stop, and play. Once the students finish recording their voice, they will "save" by going to "File" and "Export".  Files can be saved as a WAV or MP3 file. These can then be added to presentations as needed.
I have a step-by-step guide for using Audcacity on my blog under "Handout Resources".

iTalk and QuickVoice (iPad/iPhone apps)
Both of these are free apps you can add to your iPad. Students can record their voice and then email it for future use.
   

QuickVoice Recorder is a free app for the iPad and iPhone.


Once the student clicks on the app, they can begin recording. You simply hit the "record" button and start talking. Once you finish, students can title the recording by clicking the "title" button or deleting it by clicking the trash can.


In order to share the recording, students click the second to last button and select "Email Recording".


iTalk Recorder is a free app for your iPhone, but can be downloaded onto the iPad.


When iTalk Recorder is selected, students can begin recording my simply clicking the large red circle. Once they finish, they click again to stop the recording.  The recording can be named and the quality can be adjusted.


Students can email the recording by clicking the "i" located on the right side of the recording title.


These tools are rather simple for students to use and can be integrated into the curriculum in multiple ways.

1) Have the students take a piece of text and record themselves for self assessment (or teacher assessment) of fluency, accuracy, pacing, etc.

2) Students can create a QR code talking about why they would suggest a particular book to another student. This QR code could then be available to other students in the library.

3) Create a voice recording of a poem to use along with student created art work to show understanding of the poem. This project could be created with iMovie.

4) Create a voice recording of a final research project to present to the class.

5) Add short voice recordings to your Google Presentation or Prezi.

How do you create student audio recordings? Share your ideas with us!


Tuesday, September 17, 2013

Common Core and Technology

This is a hot topic for me right now! Teachers feel overwhelmed with the Common Core and when you add the technology integration, they start to panic.  My job is to help ease that panic.

Below is one of the excerpts from my Common Core and Technology training I conduct for educators in my district and at conferences.

Enjoy!

Common Core and Technology - Writing Standard #7

Sunday, September 1, 2013

blogging in the classroom

The Common Core State Standards have put an emphasis on writing. My daughter, for example, has to write in all of her core subject classes.

One way teachers have integrated writing in the content areas is through a writing journal.  Probably the most common way teachers use writing journals in the classroom is with pre-made writing prompts. You can do a search for "writing prompts" and probably be set for life!  You have to ask yourself though, are these writing prompts that someone else created benefiting my students.

Writing journals can be used in numerous ways. Students can use writing journals to record science observations and hypotheses for experiments. In math, students can write their thinking or thought process for solving a problem.

One thing these writing journals do not help students with is using technology. Technology is another emphasis you see in the Common Core State Standards. So how can we take the writing journal and make it more Common Core friendly?  The answer is the weblog or blog.

A blog is simply an online writing journal. The poster, the one who writes the blog entry, expresses their feelings/thoughts, shares ideas, or just talks about nothing in particular. Blogs can be a collection of entries from one person or multiple people.

The use of blogs in the classroom can be rather beneficial and relatively simple.

The first you need to do is make sure you school district's AUP allows you to incorporate classroom/student blogging. While you are at it, you will want to get some insight into what blogging websites are ok to use in your district.  In my district, for example, the teachers incorporate blogging directly within their classroom website. Some districts may allow sites like Word Press, Blogger, or Edublogs. The fun part, for me at least, is creating and decorating your blog.  This may be the elementary teacher in me coming out!

Once created, you are ready to start blogging, well almost!  This is a great time to talk with your students about digital citizenship and their digital footprint.  You want to model, model, model, and model some more about how to blog and respond to comments appropriately.  Resources like Common Sense Media can help you with how to talk to your students about digital citizenship and digital footprints.

Ok now you are ready, but what do you want to blog about? What do you want the students to get out of blogging? Do you want your students to respond to a question? Do you want the students to share their writing? Do you want to venture into using blogs in all of your content areas? For my daughter, blogging in the classroom involves responding to a question provided by the teacher. This limits the blog response, but still provides her with the opportunity to express her thoughts in an online format.

So lets get back to the fact the blogging will help with meeting the writing emphasis located in the Common Core State Standards.

Writing Standard #6 (grades K-12)
In this standard, students are to use digital tools to produce and publish writing. By allowing students to create a blog post, they are able to publish writing for varied audiences. You can take this one step further by allowing students to comment on other blog posts. These comments will not be as polished as a post, but it allows the students an opportunity to "write", use a digital tool, and express their thoughts and feelings about someone else's work.

Writing Domain: Text Types and Purposes (grades K-12)
In this standard, students can use the blog to publish their narrative, opinion, or informative writing. This again, allows the students to use a digital tool and gives other students to opportunity to comment on someone else's piece of writing. The comments can't be "I like your story" but rather followed-up with reasons and examples.

Writing Domain: Range of Writing (grades 3-12)
By allowing students to blog, you are providing them the time and opportunity to vary their writing. The above mentioned suggestions provide students with a good range of writing.

Do you allow your students to blog?  If the answer is no, then what is stopping you?  If you do let your students blog, share your experiences with us!


Wednesday, August 28, 2013

Boys and girls, lets learn the keyboard!

In the Common Core State Standards, we see the word "keyboarding" appear for the first time in the third grade ELA standards.

Writing Standard #6 -  (third grade) With guidance and support from adults, use technology to produce and publish writing (using keyboarding skills) as well as to interact and collaborate with others.


By the fourth grade, the standard becomes a little more intimidating for teachers and students because of 10 words - type a minimum of one page in a single sitting


Writing Standard #6 - (fourth grade) With some guidance and support from adults, use technology, including the Internet, to produce and publish writing as well as to interact and collaborate with others; demonstrate sufficient command of keyboarding skills to type a minimum of one page in a single sitting.


What do you mean my 4th graders have to type one page in a single sitting?!  I can't even type one page in a single sitting half the time!  Then you have to wonder, what is considered one page and how long is a single sitting. I wonder if the 1 inch margins and Times New Roman, size 12 is the standard.  I am a Comic Sans, size 14 girl myself. :0)


So, what is a teacher to do?  Teachers can introduce students to the keyboard! Its not as scary as it sounds, but it does take a little planning and patience.  Remember, you didn't start off as a fast typer when your fingers first touched the keyboard .. and neither will your young students!


Students need to have two types of keyboarding activities - formal keyboarding and real world (or authentic) keyboarding. You don't want to focus too heavily on one. If all your students do is real world keyboarding, they may never understand the fundamentals.  What is the balance between the two? I don't know. I believe that balance will be different for each group of students.


If you do a Google search for keyboarding activities, you will have an endless list of website to check out.  I personally have a two rules for formal keyboarding activity websites.


(1) There can't be so many ads that I can't "see" the keyboarding activity.

(2) The sound can't overpower the activity.

These are some of the formal keyboarding activities that meet my two rules.

~ Typing Web / Typing Ace

These two sites go together. Typing Web is the free version of Typing Ace. Teacher can create classes with individual student logins. The students start with the basics, the home row keys. Teachers can access reports and monitor their students' progress.

~ Typing Club

Typing Club is like Typing Web. There are two additions to Typing Club I do enjoy though. The students can login using the gmail accounts. This is perfect for our district because students in grades 3-12 have gmail accounts through Google Apps for Education. The second thing I enjoy is the students can "play a game" after so many lessons.

~ Peter's Online Typing Course

If you don't want to fool around with student login/password information, you may want to try these typing lessons. There are 16 lessons the students can complete at the leisure and in whatever order they decide. There are some ads, so be careful but the ads don't overpower the keyboarding activities.

If you want just some fun keyboarding games, these are some of my go to resources.


~ ABCYa! 

This is an awesome website to begin with, but they have about five keyboarding games for multiple grade levels. I have used the Keyboarding Zoo game with Pre-K students and they loved the activity!

~ Dance Mat Typing
This is another fun keyboarding game that students enjoy using. You don't have any ads and the game keeps their attention!

You can find more keyboarding games on my Pinterest board as well!


Students also need to be involved in real world or authentic keyboarding activities.  The Common Core State Standards helps with this within the Writing Standards for all grade levels. Some activities that I see teachers using often include:


~ typing the final draft of a paper or paragraph

~ typing spelling words
~ typing out a science observation

These simple activities allow the students to use the keyboard while working on an academic assignment.  This list is rather short, but just about any ELA standard could be incorporated into a real world typing activity.

So, how do you teach and incorporate keyboarding in your classroom? Please share your ideas and thoughts!

Thursday, March 28, 2013

I should have recorded that...

Have you ever taught a great Common Core lesson/activity and wished later you would have recorded it?  Well, we wish you would have recorded it too!

There are several ways you can record yourself or just your lesson for sharing purposes.

(1) Swivl - www.swivl.com
The Swivl is a great device I came across while watching an App Smackdown session from the Tech&Learning Tech Forum in March 2013. The camera, in a nutshell, connects to your IOS device and records a video including voice of you and whatever is behind you. The video can then be shared via YouTube, iTunes U, and just saved to your computer for later use.

(2) Jing and Screencast-O-Matic
These are just two examples of ways you can create a screencast or video of whatever is on your desktop. You can create a screencast to model or teach a concept to your students. Perhaps you want to explain how students can perform a search on KidRex or NetTrekker, a screencast will allow you to make a reference students can use over and over again. You can also create a screencast on how to solve a two-step word problem using one of the resources above and your IWB software.  The ways and ideas are numerous!

Jing can be downloaded from http://www.techsmith.com/download/jing/default.asp on both PC and iMac.  Jing will allow you to create a 5 minute movie for free. Five minutes is a lot of time if you really think about it. Movies can then be uploaded to screencast.com for further sharing.

Screencast-O-Matic is a website that allows you to create a movie that can be saved to your computer or shared. (www.screencast-o-matic.com)

(3) ShowMe, EduCreations, ScreenChomp, Explain Everything
These are four examples of iPad apps that allow you to create screencasts on your IOS device and share out to others. Each program has its pros and cons, including how the screencast can be created and how it is shared. Educreations, for example, wants you to create an account for sharing. The screencasts you create can be private, if needed.

ShowMe
http://www.showme.com/
https://itunes.apple.com/us/app/showme-interactive-whiteboard/id445066279?mt=8&ls=1

EduCreations
http://www.educreations.com/
https://itunes.apple.com/us/app/educreations-interactive-whiteboard/id478617061?ls=1&mt=8

ScreenChomp
https://itunes.apple.com/us/app/screenchomp/id442415881?mt=8

Explain Everything
http://www.explaineverything.com/
https://itunes.apple.com/us/app/explain-everything/id431493086?mt=8

Now that the lesson/activity is scheduled, you do you do?  You SHARE IT!

If you want to share these with your students, create a reference folder through DropBox or Google Drive that contains all of the screencasts. This allows the students to have access to those reference materials.

If you want to share these with other teachers (which we want you to do) then you could create a blog or an iTunes U account.

As teachers around the US are continuing to understand the Common Core State Standards, we need to band together and learn/share with each other.

Monday, March 25, 2013

Mississippi Common Core Collaboration

I am very excited to be part of the founding group of something awesome for Mississippi educators - the Mississippi Common Core Collaboration website and networking group.

The mission of the Mississippi Common Core Collaboration is the facilitate preparedness and ensure success in achieving the expectations established by the Common Core State Standards.

We want to provide all stakeholders - educators, parents, students, community members - with the resources necessary to ensure success on teaching/learning/understanding the Common Core State Standards.

WE WANT YOU! We want you to become part of this group that is dedicated to all things Common Core. You can join, learn, and share! You can do so by doing two things:

(1) go to the Mississippi Common Core Collaboration website
This site will be the go-to resource for Common Core. It is still a work in progress, but resources are added daily.  The current website address is curriculum.psd.ms/curriculum

(2) join the Mississippi Common Core Collaboration LinkedIn group
Are you a member of LinkedIn? If so, search for our group and join. This is a great opportunity to talk to other MS educators about the Common Core.  If you are not a member of LinkedIn, join the site and then join our group.

If you are not an educator in Mississippi, its ok! We still encourage you to join this great group!