Thursday, November 28, 2013

presentation creation and the iPad

There are so many great apps out there students and teachers can use to create presentations.  One of those apps is free (yes.. free) for a limited time - Doodlecast Pro


Doodlecast Pro has a clean design with easy to understand icons for students and teachers. The presentation can be paused, continued, and saved through out the process.  Students can also open already saved presentations.


Being able to select from multiple background images has great potential. Students can select from multiple math and language arts backgrounds, like graphing paper, a comic strip, grid, and notebook paper. There are also backgrounds for music and sports. Images from the iPad's Camera Roll can also be added to the presentation. One other feature I like about Doodlcast Pro is the ability to add multiple pages to a presentation.


The drawing tools available on Doodlecast Pro include the pen, fill, pointer, and eraser. The pointer (shown above) allows you to change the color and shape of the pointer. The pen and fill allow you to change color and pen size.


Once a presentation is created, you can share through your Camera Roll on the iPad, email, YouTube, or Dropbox.  I like having share options. Student use iPads may not have a "working" email address but may have a classwide Dropbox account.

Doodlecast Pro can be used through out the school day.

~ create an example video on parts of speech to show understanding
~ create a video introducing weekly vocabulary words to post on a class website
~ create a step-by-step video showing how to solve a math problem
~ retell a story 
~ retell a particular topic from science or history
~ create a learning video for a younger class
~ create an explanation video to help reteach of topic or concept

How could you use Doodlecast Pro in your classroom?

Wednesday, November 27, 2013

No.. the standard doesn't say PowerPoint (part 2)

What?! Are you still using PowerPoint?  I understand, for many teachers PowerPoint is the go-to resource because they know if backwards and forwards.  Try these resources and ideas when Speaking & Listening Standard #5 is in front of you.

Third Grade - #5 Create engaging audio recordings of stories or poems that demonstrate fluid reading at an understandable pace; add visual displays when appropriate to emphasize or enhance certain facts or details

Fourth Grade - #5 Add audio recordings and visual displays to presentations when appropriate to enhance the development of main ideas or themes.

In part 1, we looked at resources students can use for create audio recordings. For part 2, we will look at visual displays both students and teachers can use when presenting information.

Infographics

Students (and teachers) can present data in beautifully through infographics.  Infographics are graphics that present information. You need to make sure you have the data (research) completed before you start putting everything together. Without data, you will find your students staring at the computer screen for a while not knowing what to do!

http://infogr.am/ and http://www.easel.ly/ ~ Two resources students and teachers can use to create infographics.

You will want to explore both sites before letting your students loose in the computer lab.

Student Created Visual Displays

Students don't need to do a Google Image Search to find presentation enhancing visual displays.  These displays can be student created in many ways.

My daughter gets frustrated when she can not find the image she wants to use. Even though she isn't an artist, she can create just the right illustration for her presentation.  Let your students draw just what they want to enhance their presentation.  Then scan or take a picture of the illustration so students can add them as needed.

Don't let picture taking stop at shooting student drawings.  Let students get creative and get pictures and/or videos to enhance what they are researching. For example, if the students working on a presentation of a historical figure, let the students reenact an event and record it. Yes, it may be easier to find a historical video, but the students will really take ownership of their learning and the project if they create their own video.

Visual displays do not have to high tech. Students can create posters that showcase the main points or key ideas for the presentation.

So, do you feel comfortable walking away from PowerPoint yet?

Saturday, November 23, 2013

No.. the standard doesn't say PowerPoint (part 1)

Teachers... step away from PowerPoint! No where does it say for students to create one!

For most teachers, when they read the below Speaking & Listening standards, they assume it means to create a PowerPoint. Students can use multiple resources that don't include PowerPoint to meet these standards.

Third Grade - #5 Create engaging audio recordings of stories or poems that demonstrate fluid reading at an understandable pace; add visual displays when appropriate to emphasize or enhance certain facts or details

Fourth Grade - #5 Add audio recordings and visual displays to presentations when appropriate to enhance the development of main ideas or themes.

We are going to focus on audio recordings and the different resources out there for students and teachers. If your students are anything like my 3rd grade daughter, recording their voice should be no problem.

Vocaroo @ www.vocaroo.com
This is a web based voice recorder. You will find the website is straight forward and rather simple for students to use.

Students go to the website and click on the "Click to Record" button.  They will, of course, need a microphone.


Once the student finishes recording, they can listen, retry, or save the recording.

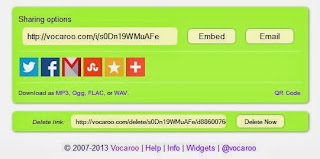
Students can "save" the recording in multiple ways. The recording can be shared on social media, like Twitter or Facebook. The recording can be downloaded as a MP3 or even made into a QR code.


Audacity (software for PC or MAC) @ http://ninite.com/ or http://audacity.sourceforge.net/
This is a program that can be downloaded for free on either PC or MAC. It looks intimidating, but is easy to use for voice recording.

The students will use three buttons - record, stop, and play. Once the students finish recording their voice, they will "save" by going to "File" and "Export".  Files can be saved as a WAV or MP3 file. These can then be added to presentations as needed.
I have a step-by-step guide for using Audcacity on my blog under "Handout Resources".

iTalk and QuickVoice (iPad/iPhone apps)
Both of these are free apps you can add to your iPad. Students can record their voice and then email it for future use.
   

QuickVoice Recorder is a free app for the iPad and iPhone.


Once the student clicks on the app, they can begin recording. You simply hit the "record" button and start talking. Once you finish, students can title the recording by clicking the "title" button or deleting it by clicking the trash can.


In order to share the recording, students click the second to last button and select "Email Recording".


iTalk Recorder is a free app for your iPhone, but can be downloaded onto the iPad.


When iTalk Recorder is selected, students can begin recording my simply clicking the large red circle. Once they finish, they click again to stop the recording.  The recording can be named and the quality can be adjusted.


Students can email the recording by clicking the "i" located on the right side of the recording title.


These tools are rather simple for students to use and can be integrated into the curriculum in multiple ways.

1) Have the students take a piece of text and record themselves for self assessment (or teacher assessment) of fluency, accuracy, pacing, etc.

2) Students can create a QR code talking about why they would suggest a particular book to another student. This QR code could then be available to other students in the library.

3) Create a voice recording of a poem to use along with student created art work to show understanding of the poem. This project could be created with iMovie.

4) Create a voice recording of a final research project to present to the class.

5) Add short voice recordings to your Google Presentation or Prezi.

How do you create student audio recordings? Share your ideas with us!